The First Screen Answer: Why Sterilization is Non-Negotiable
Are you absolutely sure your glass jars are truly clean? When you’re preparing homemade preserves, storing food, or packaging commercial food products, sterilization is not just a best practice—it is your first line of defense against spoilage, contamination, and product failure. The good news? It’s a simple process that guarantees the safety and longevity of your product.
For quick, reliable home use, the Boiling Water Bath is the gold standard: submerge your clean jars in rolling boiling water for 10 minutes to eliminate harmful bacteria, yeasts, and mold. For commercial-scale operations, however, industrial-grade dry heat sterilization is the only acceptable method, ensuring a pristine, ready-to-fill container. Don't risk compromising your product's integrity—a few simple steps are all it takes to guarantee success.
1. Why Sterilization is Your First Line of Defense Against Spoilage

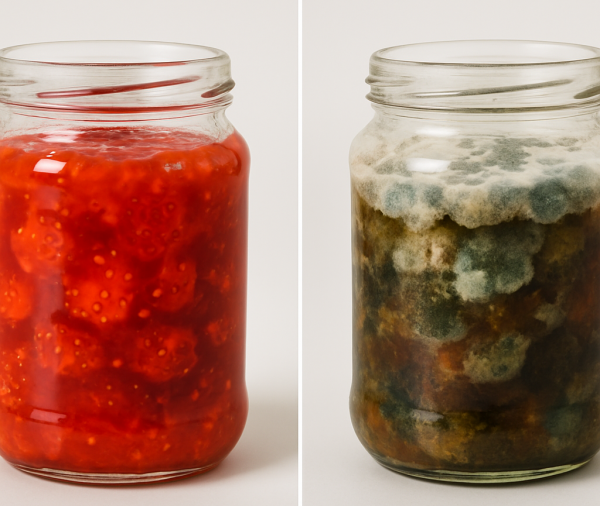
Imagine spending hours perfecting a jam recipe or preparing a batch of pickled vegetables, only to have it ruined by unseen microbes. Why take the risk? Sterilization is the process of eliminating all living microorganisms, including bacteria, fungi, and spores, from the jar's surface. Without this crucial step, these dormant contaminants can quickly multiply, leading to:
- Food Spoilage: Jams, pickles, and sauces can ferment, mold, or develop off-flavors.
- Product Contamination: For non-food items, unsterilized containers can introduce impurities that compromise the product's quality or reduce shelf life.
- Health Risks: In canning, improper sterilization can lead to serious health hazards, including botulism.
The key takeaway is simple: Clean is not the same as sterile. A quick wash removes visible dirt, but only sterilization kills the microscopic threats.
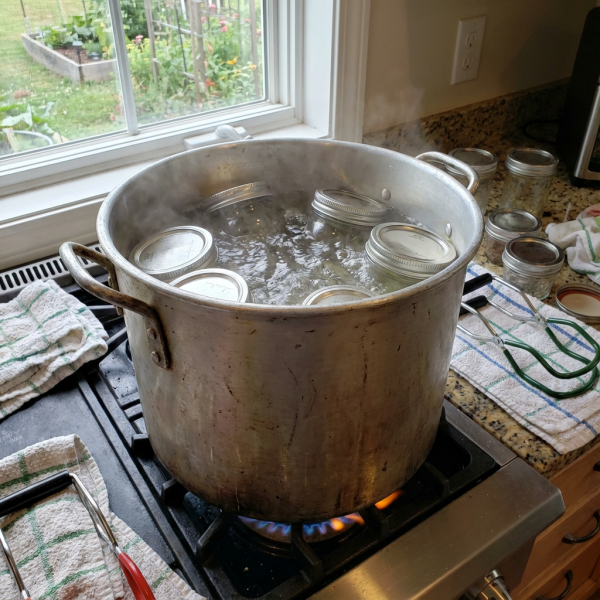
2. Method 1: The Gold Standard - Boiling Water Bath
The boiling water bath is the most common and universally recommended method for home canning and general sterilization. It is effective, simple, and requires only basic kitchen equipment.
The Process:
- Pre-Clean: Wash jars thoroughly in hot, soapy water and rinse well.
- Submerge: Place the clean jars right-side up on a rack in a large pot or canner. Fill the pot and the jars with hot (not boiling) water until the water level is at least one inch above the jar tops.
- Boil: Bring the water to a rolling boil.
- Time: Once boiling, start the timer. Boil for a minimum of 10 minutes at sea level (up to 1,000 feet).
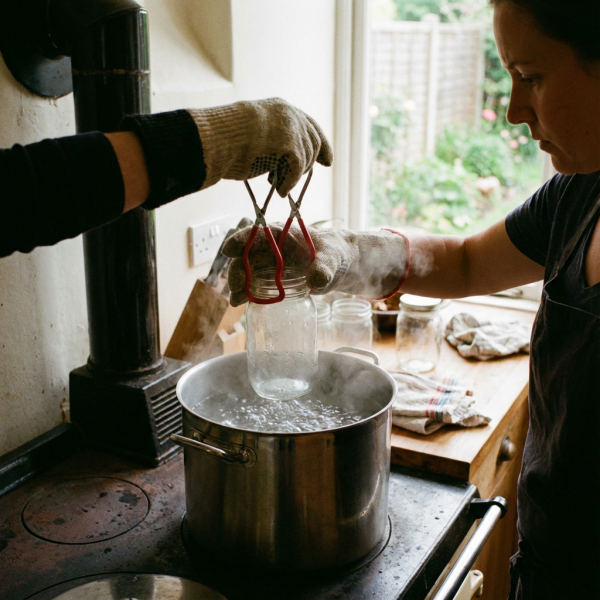
- Remove: Use sterilized tongs or a jar lifter to carefully remove the hot jars, tilting them slightly to pour the water back into the pot. Place them upside down on a clean, dry towel to air-dry.
Altitude Adjustment: A Critical Detail
Did you know that water boils at a lower temperature at higher altitudes? This means you need to increase the boiling time to compensate for the lower heat. Ignoring this step is a common mistake that compromises sterilization.
| Altitude (Feet) | Altitude (Meters) | Additional Time (Minutes) | Total Boiling Time (Minutes) |
|---|---|---|---|
| 0 - 1,000 | 0 - 305 | 0 | 10 |
| 1,001 - 3,000 | 306 - 915 | +1 | 11 |
| 3,001 - 6,000 | 916 - 1,830 | +2 | 12 |
| 6,001 - 8,000 | 1,831 - 2,440 | +3 | 13 |
| 8,001 - 10,000 | 2,441 - 3,050 | +4 | 14 |
Video Tip: For a visual guide, check out this popular tutorial on the boiling water method: https://www.youtube.com/watch?v=bNbW1YLmKrs (Title: Sterilizing Jars & Lids for Canning)
3. Method 2: The Time Saver - Oven Sterilization
For those who need to sterilize a large batch of jars simultaneously, the oven method is a popular alternative, though it comes with a crucial safety warning.

The Process:
- Pre-Clean: Wash and rinse jars as usual.
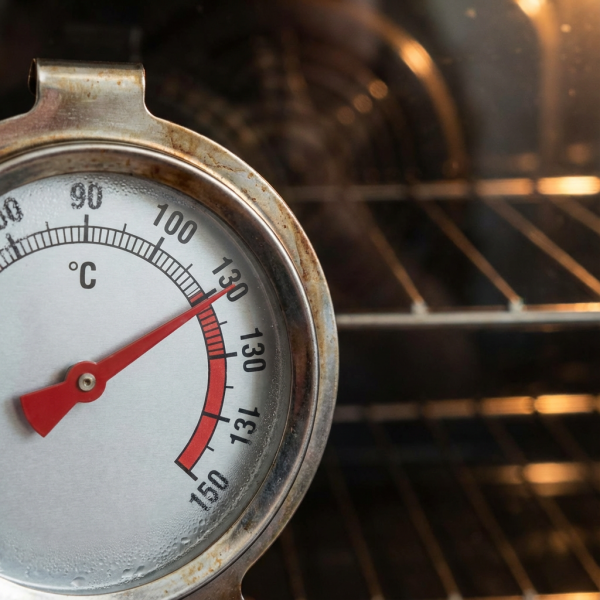
- Heat: Preheat your oven to 130°C (275°F). Do not exceed this temperature, as it can cause the glass to crack or shatter due to thermal shock.
- Arrange: Place the clean, still-damp jars upright on a baking sheet lined with parchment paper. The residual moisture is key, as it creates steam inside the jar, aiding the sterilization process.
- Sterilize: Bake for 20 minutes.
- Safety First: Use thick oven mitts to remove the jars. Crucially, never put cold contents into a hot jar, or hot contents into a cold jar. The temperature difference can cause the glass to break.
> ⚠️ Safety Warning: Many jar manufacturers, including Ball and Mason, advise against oven sterilization due to the risk of uneven heating and potential glass breakage. Use this method with caution and at your own risk.
4. Quick Alternatives: Dishwasher and Chemical Methods
While boiling and oven methods are preferred for high-risk applications like canning, these alternatives are suitable for general sanitization or low-risk items (e.g., decorative jars, dry storage).
Dishwasher Method
If your dishwasher has a "Sterilize" or "High-Temperature Wash" cycle, you can use it. Ensure the jars are clean and run the cycle without detergent. The jars must be filled immediately after the cycle finishes, while they are still hot.
Chemical Method (Vinegar)
For a non-heat approach, distilled white vinegar is a powerful, natural sanitizer.
- Fill the jar with a solution of 1 part vinegar to 4 parts hot water.
- Let it sit for 10 minutes.
- Rinse thoroughly with hot water to remove the vinegar odor.
5. Sterilization Method Comparison: Which is Right for You?
Choosing the right method depends on your application, available time, and equipment. This table provides a quick overview.
| Method | Temperature | Time (Approx.) | Best For | Pros | Cons |
|---|---|---|---|---|---|
| Boiling Water | 100°C (212°F) | 10-15 min | Canning, High-Risk Food | Most reliable, universally accepted. | Requires large pot, can be messy. |
| Oven | 130°C (275°F) | 20 min | Large Batches, Dry Storage | Can sterilize many jars at once. | Risk of glass breakage, not recommended by all manufacturers. |
| Dishwasher | ~80°C (176°F) | Full Cycle | Quick Sanitization, Low-Risk | Convenient, hands-off. | Not always true sterilization, hard to time with filling. |
| Vinegar | Room Temp | 10 min | Non-Heat Sensitive Items | Chemical-free, easy for small items. | Requires thorough rinsing, not true sterilization. |
Conclusion: Your Path to a Pristine Product
Sterilizing your glass jars is a small investment of time that yields a massive return in product quality, safety, and shelf life. Whether you are a home enthusiast or a large-scale manufacturer, the principle remains the same: eliminate the risk of contamination before you fill the container.
For home use, stick to the Boiling Water Bath and remember to adjust for altitude. For commercial operations, the need for perfectly clean, high-quality glass is paramount.
📞 Ready to Elevate Your Packaging? (Call to Action)
As a leading supplier of high-quality glass food jars and bottles, we understand that the integrity of your product starts with the container. From the moment your glass arrives, its cleanliness and quality are our top priority.
If you are looking for premium glass food jars, bottles, or other packaging solutions, look no further. We export to Europe, America, the Middle East, Southeast Asia, and South America, providing reliable, beautiful, and safe packaging for your brand.
Contact us today to discuss your wholesale glass packaging needs:
- Email: sales@glassypack.com
- Contact Us Link: https://glassypack.com/index.php/contact-us/
Let us be your trusted partner in packaging excellence.