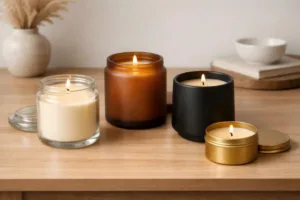
You see glass bottles1 every day, but have you ever wondered about the intense process behind them? It seems like magic, turning sand into a perfectly shaped, crystal-clear container for your favorite products.
Glass bottles are made by melting raw materials like sand and limestone at over 1500°C, forming the molten glass into a precise shape using a mold, carefully cooling it for strength in a process called annealing2, and passing it through multiple stages of rigorous quality control.
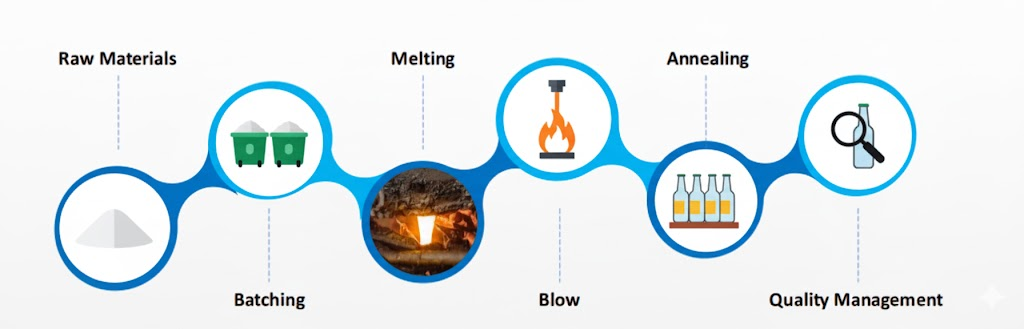
The journey from raw sand to a finished glass jar is a fascinating mix of raw power and delicate precision. As someone who has been in this industry for over a decade, I've seen how every single step is critical. A mistake in temperature, a tiny impurity in the raw materials, or an imperceptible flaw in a mold can lead to thousands of rejected bottles. Let me walk you through the entire process, from the fiery furnace to the final, decorated product you see on the shelf.
What Really Goes Into a Glass Bottle Before It's Formed?
You might just see a simple, clear bottle, but its creation starts with a very specific recipe. Getting this initial stage wrong means the entire production run could be a failure, resulting in discoloration or weakness.
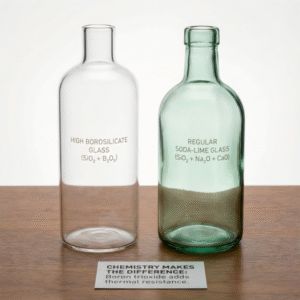
A glass bottle begins as a precise batch of raw materials—primarily sand, soda ash, and limestone. We meticulously test these materials for impurities like iron and excess moisture, as even a tiny variance can compromise the color and integrity of the final product.

This is the foundation of quality. Before anything enters our furnaces, every batch of raw material undergoes strict testing. We measure moisture content to ensure consistency and analyze for trace elements. One of the most critical checks is for iron content. Too much iron will give a green tint to what should be a "super flint" or crystal-clear bottle. After batching, the mix is fed into a furnace and melted at extreme temperatures, transforming the solid powders into a glowing, molten liquid called a "gob." This gob is the lifeblood of the production line, and its purity is everything.
Key Raw Material Quality Checks:
| Quality Control Step | Purpose | Why It's Critical |
|---|---|---|
| Moisture Content Check | Ensures proper consistency in the melting process. | Prevents inconsistencies and defects in the molten glass. |
| Iron Content Measurement | Controls the final color and clarity of the glass. | High iron causes an unwanted green or amber tint in clear glass. |
| Trace Element Analysis | Guarantees the chemical purity of the mixture. | Adheres to strict safety standards like FDA and EU regulations. |
How Is Molten Glass Shaped Into a Perfect Bottle?
Shaping a 1500°C glob of molten glass into a uniform bottle millions of times over seems impossible. How do we ensure every bottle has the same thickness, capacity, and a perfectly formed neck for sealing?
We use two primary automated methods: the "Blow-and-Blow3" for narrow-neck bottles and the "Press-and-Blow4" for wide-mouth jars. In both, a gob of molten glass is shaped in a preliminary mold and then transferred to a final mold to be blown into its finished form.
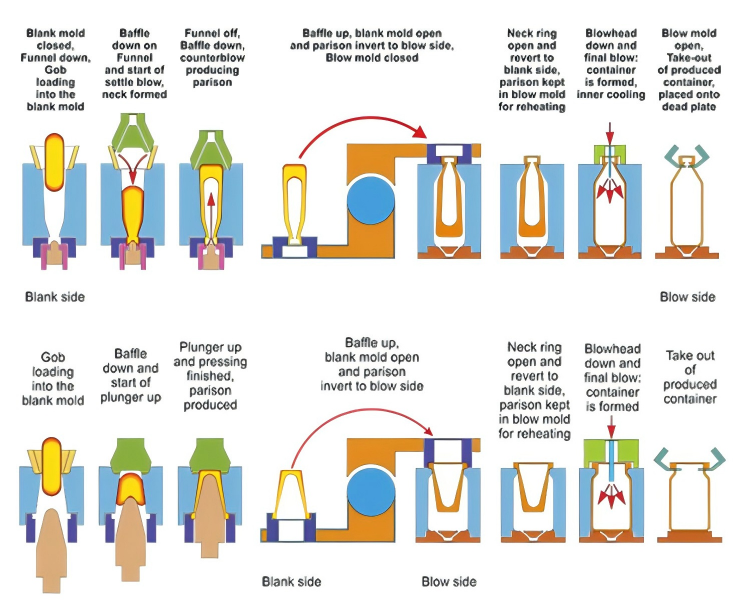
This is where the magic happens. For a small-opening bottle (like for spirits or beverages), we use the Blow-and-Blow3 method, which uses compressed air to form the initial shape (parison) and then the final bottle. For a wide-mouth jar (like for jam or cosmetics), we use the Press-and-Blow4 method, where a plunger first presses the glass into the initial mold. A more advanced technique, Narrow Neck Press and Blow (NNPB)5, allows us to create bottles that are up to 25% lighter but just as strong, saving on costs and materials. Each method requires incredible precision in mold design, temperature control, and timing, all automated by our I.S. (Individual Section) machines.
How Do We Make a Glass Bottle Strong Enough for Use?
A bottle fresh from the mold looks perfect, but it's incredibly fragile. The rapid cooling of the outer surface while the inside is still hot creates immense internal stress, making it liable to shatter with the slightest touch.
To make a bottle strong, it must go through a controlled cooling process called "annealing2." The bottles travel slowly through a long oven, called a lehr, which reheats them and then gradually cools them down over a long period, releasing all internal stresses.
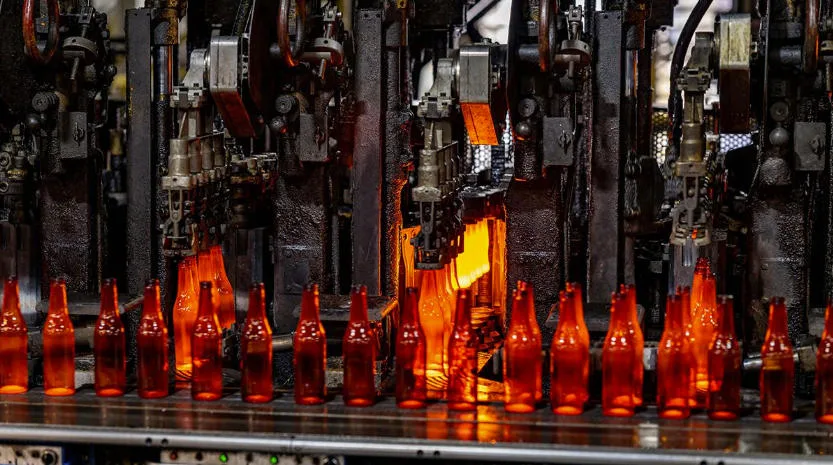
Annealing is a non-negotiable step for durability. Inside the annealing2 lehr, we carefully bring the temperature of the entire bottle back to a uniform level and then reduce it at a very precise, slow rate. This allows the glass molecules to settle into a stable, stress-free structure. Skipping or rushing this process would result in a product that could spontaneously break during filling, capping, or even just sitting on a shelf. Our quality control team uses equipment like a polarizing stress tester to verify that the annealing2 process was successful and that the bottle is structurally sound and ready for the world.
How Does a Plain Bottle Get Its Beautiful Design?
A clear bottle is functional, but branding turns it into a premium product. How do we add intricate logos, rich colors, and unique textures that catch your eye on the shelf?
We use a variety of finishing techniques to customize bottles, including screen printing6 for logos, decals for complex images, electroplating for a metallic finish, and frosting for a matte texture. Each process requires specific equipment, materials, and temperature controls to ensure a durable, high-quality finish.
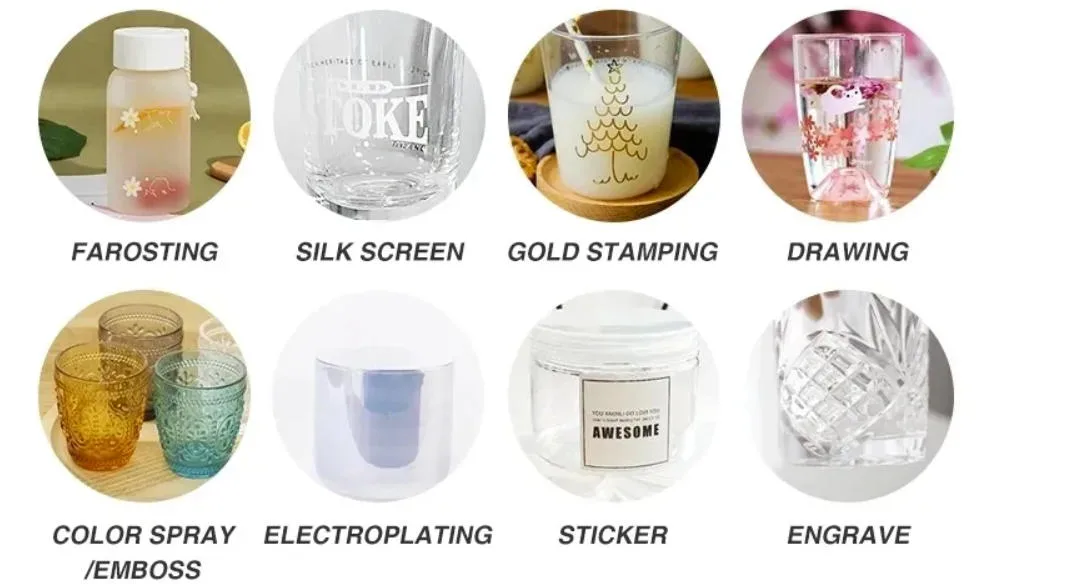
This is where art meets science. The choice of technique depends entirely on the brand's vision. Screen printing is perfect for bold, one- or two-color logos. For photorealistic or multi-colored designs, we apply a decal that is then baked onto the glass. Techniques like hot stamping create elegant metallic designs, while electroplating can cover the entire bottle in a shiny gold or silver layer. Even a simple frosted or matte finish can completely change the feel of a product. At GlassyPack, we manage this entire process, from ensuring the right ink is used for durability to calibrating the baking temperatures perfectly, transforming a simple container into a piece of brand identity.
Conclusion
From a carefully measured pile of sand to a beautifully decorated and resilient container, making a glass bottle is a journey of transformation. It demands immense heat, intricate engineering, and relentless quality control7 at every single step.
Explore the various types of glass bottles and their applications to understand their significance in packaging. ↩
Understand the critical annealing process that ensures the strength and durability of glass products. ↩
Explore the Blow-and-Blow method and its significance in shaping glass bottles. ↩
Learn about the Press-and-Blow method and its advantages in producing wide-mouth jars. ↩
Discover the innovative NNPB technique and its benefits in creating lightweight glass bottles. ↩
Discover how screen printing is used to create vibrant designs on glass bottles. ↩
Find out how quality control is implemented in glass production to maintain high standards. ↩